TJ* Complete Kit - First Release - Modified Nov 11, 2012
This is the Arduino Code that ships on Complete TJ* Kits for Kickstarter backers! Feel free to download, peruse, re-use and edit it. I look forward to seeing what you do with it!
TJ* Complete Kit - Release Code - Nov 11, 2012
| tj_code_jkessler_2012_11_17.ino |
Operating a programmed Complete Kit
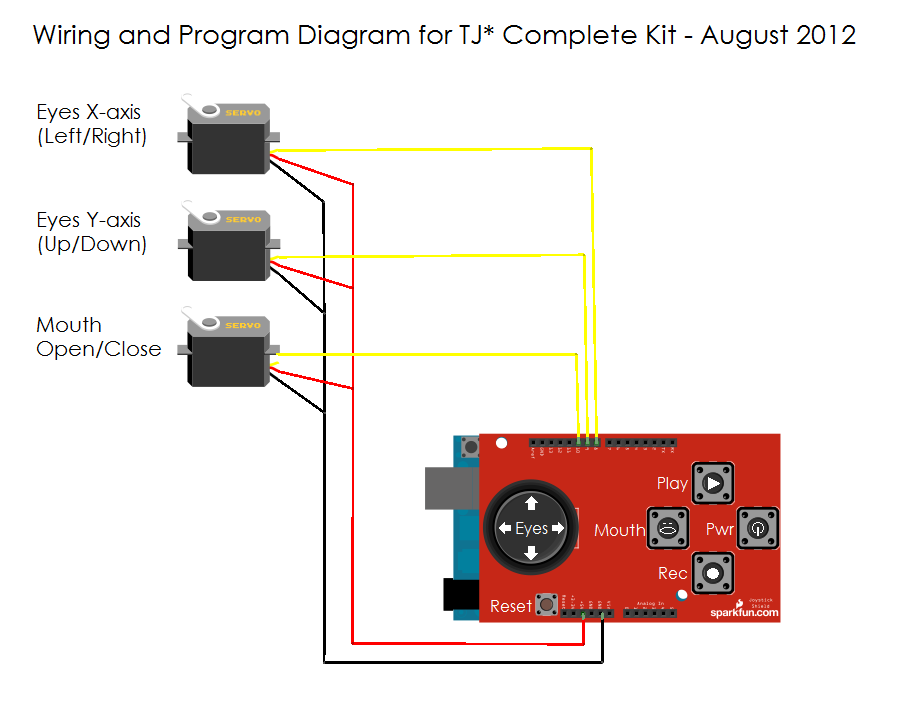
1) TJ*s Controller:
Looking at the controller with the Joystick on the left and sparkfun logo right-side-up on the bottom right, see the buttons marked in the image below!
2) Power:
Plug in to a USB printer cable or Arduino-compatible wall transformer (check arduino.cc for what specs are needed)
3) Startup:
There are 4 states or modes that TJ* can be in:
Off
Live
Recording
Playing Back
TJ* starts up in Off mode. To put TJ* in live mode, push the on/off button. Now he'll respond to the joystick and mouth buttons!
4) On/Off:
To turn TJ* on or off / back on, use the on/off button.
5) Recording:
TJ* can record motion for up to 12 seconds. To start recording, press the RECORD button. Then he'll appear to be in Live mode. To stop recording, push the RECORD or ON/OFF buttons. If you run out of record time, TJ* will go into Off mode but still remember the 12 seconds you recorded.
6) Playback:
To start playback, press the PLAY button. TJ* won't respond to the eye or mouth controls during playback. To stop playback, change TJ*s mode using the RECORD or 'On/Off' buttons. If you press PLAY again, TJ* will start the routine over again. When TJ* is done with playback, he'll go into either Off or Live mode, depending on what mode you were in when you pressed play.
7) Finishing up:
When you're done playing with TJ*, I'd recommend leaving TJ* in Off mode to save electricity and not wear his servos. You can also unplug him. Remember, if you plug him back in, he starts up in Off mode!
Getting Started (re-)Programming Your TJ*
To edit the code on the Arduino board that ships with your TJ*, you'll need to visit the Arduino website. They have a great guide to getting started.
Before tj_code_jkessler*.ino will compile, you'll also need to install the FSM Library by dragging the unzipped folder into your Arduino /library directory.
Before tj_code_jkessler*.ino will compile, you'll also need to install the FSM Library by dragging the unzipped folder into your Arduino /library directory.
